5 Stepts to Creating a Gallery Plant Wall

GALLERY WALL WITH PLANTS: 5 STEPS TO CREATING YOUR OWN INDOOR JUNGLE
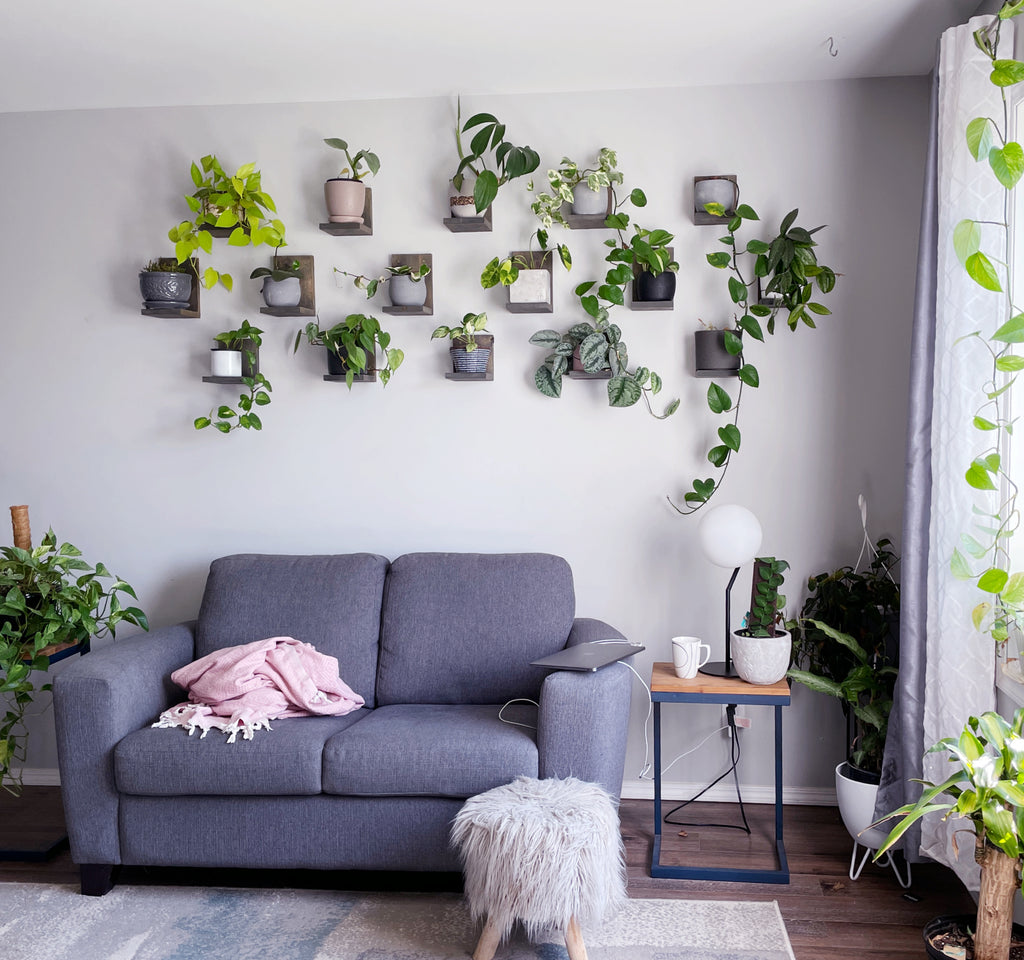
Gallery walls are BIG right now. While gallery walls are often created using a mix of different styles and sizes of artwork, you can also create a gallery wall with plants to both maximize space in your home and create a gorgeous and eye-catching backdrop.
Whether you're looking for a better background in your office for zoom calls, or to spice up a blank wall in your living area or bedroom, gallery wall plant shelves are a great way to add some greenery. Bonus, you can pet-proof your home and place toxic plants up far from reach of your four-legged friends.

STEP 1: PICK YOUR SHELVES
Not all shelves are created equal. The first, and arguably most important step, of this whole process is choosing the perfect shelves for your space.
While floating shelves may serve your purposes, to create contrast, one of the best choices is to choose an L-shaped shelf. That way, when your plants are smaller and may not fill up the space completely, you still have contrast and uniformity in the size of shelf.
Obviously, we're partial to our own handmade plant shelves, but you can also search other L shaped plant shelves on Etsy or Amazon. You can see here how the dark L shaped shelf perfectly complements this little Pearls and Jade pothos. With a floating shelf, smaller plants can be harder to style next to their more full friends.

Now, on top of the shape of the shelf you'll also want to consider colour and material.
Choosing a colour that compliments your plants instead of overwhelming them is extremely important. Unless you're going for a less organic and more industrial look, steer clear of black shelves. Instead, choose warm wood tones or even a light whitewash. (Our shelves come in this warm brown that works great on white or light grey walls, as pictured).
That brings us to the next factor: material. Shelves are only as good as the building material they're made with, so choosing wooden shelves with high-quality screws and other components is a must. When soil is saturated it can weight a LOT, so make sure to check the suggested weight maximum. Wall mounted shelves will always be stronger than shelves hung on picture wire or even sawtooth hangers, so ensure that you're choosing the right mounting style for the location you've chosen and the plants you want to feature.
Remember to use drywall anchors if you aren't mounting into a stud to ensure your new gallery wall doesn't end up on the floor! (Our gallery wall shelf kits include all mounting hardware, including drywall anchors).

STEP 2: MOUNT YOUR SHELVES
Admittedly, this step is very much about personal preference (and the number of shelves you want to mount). Our personal preference is for a staggered look, with multiple layers of shelves spaced out evenly from one another. This look can be achieved with as few as 6 shelves! 
Other great ideas are to:
- Mount them in a line horizontally, using pictures above and below to add some visual interest.
- Mount in a line vertically for a more uniform look. This is a great option if you want to mount them in your bedroom—doing three shelves mounted vertically above each bedside table, and then placing a large painting in the centre, creates pleasing symmetry.
However you mount your shelves, make sure to mount them straight and with even spacing.
Another important factor is light. If you want a lush, green gallery wall instead of a brown crispy one, you need to ensure that all plants are getting adequate light. Ensure that your shelves are either mounted close to a window or have grow lights pointed at your chosen plants.
STEP 3: CHOOSE YOUR PLANTS
Now comes the fun part—choosing your plants.
- Pothos are a fan-favourite, and for good reason. With so many colours and varieties to choose from, you can create an entire pothos gallery wall that's stunning and has tons of contrast. Pothos are hardy and will let you know when they need water, and they're incredibly easy to propagate. They grow bushy and full, and while they will get larger if you let them climb, they are perfectly happy to trail.
- Scindapsus are closely related to pothos, and in fact, one of the most popular scindapsus varieties is often mistakenly called a Satin Pothos! Scindapsus Pictus is not actually a pothos, but has many of the same care requirements.
- Philodendrons come in all shapes and sizes, and while many popular philodendrons are climbing plants, there are some very beautiful trailing philos too. Think lemon-lime and Philo Brasil.
- Hoyas may be slow growers, but they have the most luscious foliage you could ask for! And when they flower, you won't want to look away.
- Calatheas make great gallery wall plants in the right conditions. Calatheas are drama queens that love humidity, so if you're in a humid room then definitely relocate your white fusion onto the plant shelf! There are even some trailing varieties of calatheas/marantas that you can place on your shelf.

Here's our top 10 favourite plants for gallery walls:
- Marble Queen Pothos
- Manjula Pothos
- Philodendron Brasil
- Hoya Pubicalyx
- Scindapsus Exotica
- Scindapsus Moonlight
- Baltic Blue Pothos
- Philodendron Heartleaf
- Neon Pothos
- Monstera Peru
Bonus plants for high humidity, or for people who can't stop buying calatheas even though they keep dying on them:
- Calathea White Fusion
- Calathea Network
- Maranta Leuconeura “Kerchoveana” (Commonly known as Rabbit's Foot Prayer Plant)
STEP 4: CHOOSE YOUR POTS
Now that you've chosen your plants, what pots will you put them in?
We always recommend keeping your plants in their nursery pots (or our peat pots!), and then placing that nursery pot in a decorative pot. That way you ensure correct drainage for your plants, and it's far easies to transplant.
When it comes to choosing your pots for your gallery wall, the main idea is to choose a plant pot that is a different colour than your shelves. You can go wild with colours and patterns, or stick with one uniform colour, just make sure it doesn't blend in too much to your shelves.
Look how nice this white Ikea pot looks on the dark shelves! (Plant is a marble queen pothos).

An easy way to introduce some new colours and textures to your wall is by repurposing candles. Once you've burned your candle completely, remove any remaining wax and use it as a decorative pot!
STEP 5: TAKE CARE OF YOUR PLANTS
This last step may seem fairly straightforward, but there's something important to note: Depending on how high up your shelves are your watering schedule may change. If your house is hot and dry, you may find the plants at the top may need to be watered more often.
Remember to monitor your plants to make sure they're thriving in their new spot. If they're looking too leggy they may not be getting enough light.

Now you're ready to set up your own Gallery Plant Wall. Happy planting!
Leave a comment